Damascus patterns are the visible figures that surface when layered (pattern-welded) or crucible (wootz) steel gets ground and etched to reveal its internal structure. This guide catalogs the common patterns, walks through the forging techniques that produce each one, and gives you the checks needed to tell real work from a surface imitation. One thing worth knowing upfront: the pattern is mostly aesthetic and heritage. How a blade performs depends far more on steel choice and heat treatment.
TL;DR:
- Intricate mosaic patterns are the most labor-intensive and costly but do not improve cutting performance compared to simpler patterns.
- Real Damascus steel displays its pattern throughout the full thickness of the blade and shows variation from handmade forging, unlike printed or etched imposters.
- Pattern complexity mainly indicates craftsmanship effort and aesthetic appeal, not steel quality or functional durability.
- Simpler patterns like twist or ladder are preferred for hard-use knives due to easier production and reliable steel properties.
- Effective pattern recognition involves inspecting pattern depth, persistence after light grinding, and asking for detailed maker information.
Table of Contents
- Pattern-Welded, Wootz, and Stainless Damascus: What’s the Difference
- How Damascus Patterns Are Actually Forged
- The Full Catalog of Damascus Pattern Types
- Why Some Patterns Cost More (And Which One Fits Your Use)
- How to Spot Real Damascus Versus Etched or Printed Fakes
- Etching, Grinding, and Caring for a Damascus Blade
- Where to See These Patterns Done Right
- What the Pattern Actually Tells You (And What It Doesn’t)
- Bring a Real Damascus Pattern Home
- Sources
- FAQ
Pattern-Welded, Wootz, and Stainless Damascus: What’s the Difference
Not all Damascus is built the same way, and the differences matter more than most buyers realize before they start comparing blades.
Pattern-welded Damascus is what nearly every modern maker produces. A smith stacks alternating layers of two or more steel types, most commonly 1095 paired with a nickel alloy like 15N20, then forge-welds the billet under heat and pressure. The layers get folded, twisted, cut, or restacked to build the pattern, and the final shape only becomes visible after grinding and etching expose the internal structure. Performance on this style comes down to the individual steels and how they’re heat treated, not the pattern layout itself.
Crucible Damascus, often called wootz, is the historical original. Rather than stacking layers, wootz steel develops its figure from carbide banding that forms naturally inside a single ingot during a slow, controlled cooling process in a sealed crucible. This is a fundamentally different metallurgy from pattern-welding. The pattern in wootz comes from within the material itself, not from mechanically joined layers, and true wootz production is rare today because the traditional smelting process is difficult to reproduce reliably.
Stainless and powder-metallurgy Damascus fills a practical niche for buyers who want the look without the upkeep. Makers use stainless alloys or powder-metal steels that resist corrosion better than the traditional 1095/15N20 combination, though the tradeoff is usually a slightly less dramatic contrast after etching. Powder-metal versions can also achieve unusual, tightly controlled patterns that are hard to replicate through manual folding.
A few practical distinctions worth keeping straight:
- Pattern-welded Damascus requires periodic light oiling to prevent rust, since the high-carbon steel component is reactive.
- Wootz Damascus is largely a historical or specialty-collector category; genuine pieces are uncommon in today’s market.
- Stainless Damascus suits buyers who want a low-maintenance kitchen or outdoor blade and are willing to accept a subtler pattern.
For collectors researching the roots of this material, the history behind Damascus steel explains how ancient smiths achieved effects that modern makers still study.
How Damascus Patterns Are Actually Forged
Every pattern starts the same way: with steel selection. The pattern you eventually see is decided the moment a smith picks which alloys to combine.
Here’s the general sequence a maker follows, from raw billet to finished figure:
- Select contrasting steels. A high-carbon steel like 1095 gets paired with a nickel-bearing steel like 15N20 because the two react differently to acid later.
- Stack and forge-weld. Layers get cleaned, stacked, and heated to welding temperature, then hammered or pressed until the layers bond into a single solid billet.
- Manipulate the billet. This is where named patterns are born. Twisting produces spirals, cutting and restocking builds complexity, and pressing tools or dies into the hot steel creates grooves or dimples.
- Draw out and shape. The billet gets forged into a rough blade or knife shape, which stretches and distorts the internal pattern in ways experienced smiths can predict and control.
- Grind to final profile. Careful grinding exposes the layers at the surface. Grind too shallow and the pattern stays faint; too aggressive and you risk cutting through the manipulated section entirely.
- Etch to reveal contrast. The blade goes into an acid solution, typically ferric chloride, which eats into the different steels at different rates and brings the pattern into sharp visual relief.
The manipulation step is where technique separates one named pattern from another. A hot twist along the billet’s axis produces the classic twist pattern. Pressing a rounded punch into the surface before flattening creates raindrop or dimple effects. Grinding or pressing grooves across the billet, then flattening it back out, generates the rungs you see in a ladder pattern. Building a W or Turkish twist pattern takes multiple welding sequences and precise restacking, and mosaic work requires pre-arranging small tiles or rods of steel before welding, often exposing end-grain rather than folded layers to get a repeating motif.
Etching is chemistry, not magic. Nickel-bearing steel etches bright while high-carbon steel darkens, and the bigger that chemical gap, the sharper the contrast once the acid does its work. A smith who wants a bold, high-contrast pattern will often lean toward steels with a wider compositional difference; one aiming for a subtler, tonal look picks alloys closer together in composition.
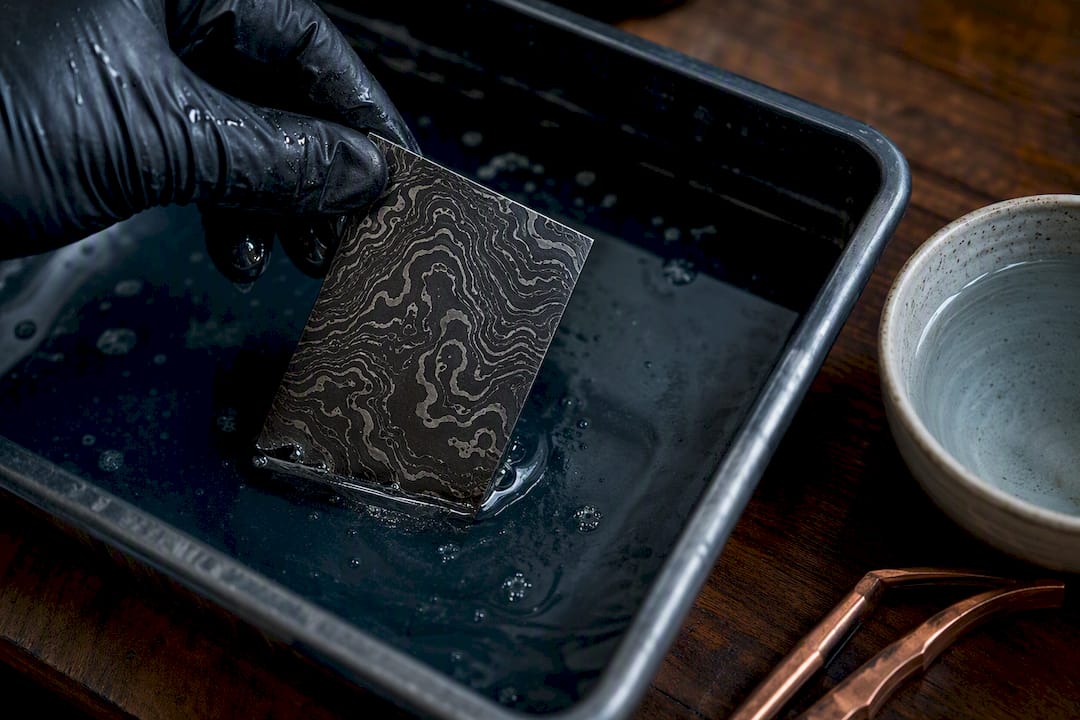
Pro Tip: If you’re evaluating a blade in person, tilt it under a strong light source and look for depth in the pattern, not just surface shading. Real forge-welded contrast has a slight three-dimensional quality because it comes from actual layer boundaries, not a flat chemical stain.
The Full Catalog of Damascus Pattern Types
Roughly ten patterns show up consistently across maker catalogs and collector references, though smiths occasionally push into hybrid or signature variations. Here’s what you’re actually looking at with each one, how it’s made, and who it tends to suit.
- Ladder pattern. Grooves are pressed or ground into the billet at intervals, then the surface is flattened so each groove leaves a rung-like line running perpendicular to the blade’s edge. It’s a moderate-skill pattern, common on both kitchen knives and hard-use blades, and reads as clean and structured rather than chaotic.
- Twist pattern. The billet is heated and physically twisted along its length before being drawn out into a blade shape, leaving spiraling lines. This is one of the more accessible patterns for makers to produce consistently, which is part of why twist Damascus shows up so often on functional, hard-use knives where the pattern is a bonus rather than the point.
- Raindrop pattern. A punch or dimple tool is pressed into the hot billet at multiple points, then the surface is flattened, spreading each dimple into a teardrop shape. It sits at a moderate difficulty level and shows up frequently on both display pieces and working blades.
- Feather pattern. Related to twist work, but the billet is split and reworked so the lines flow outward like a feather’s barbs. It demands more precision than a basic twist and tends to land on knives meant for admiring as much as using.
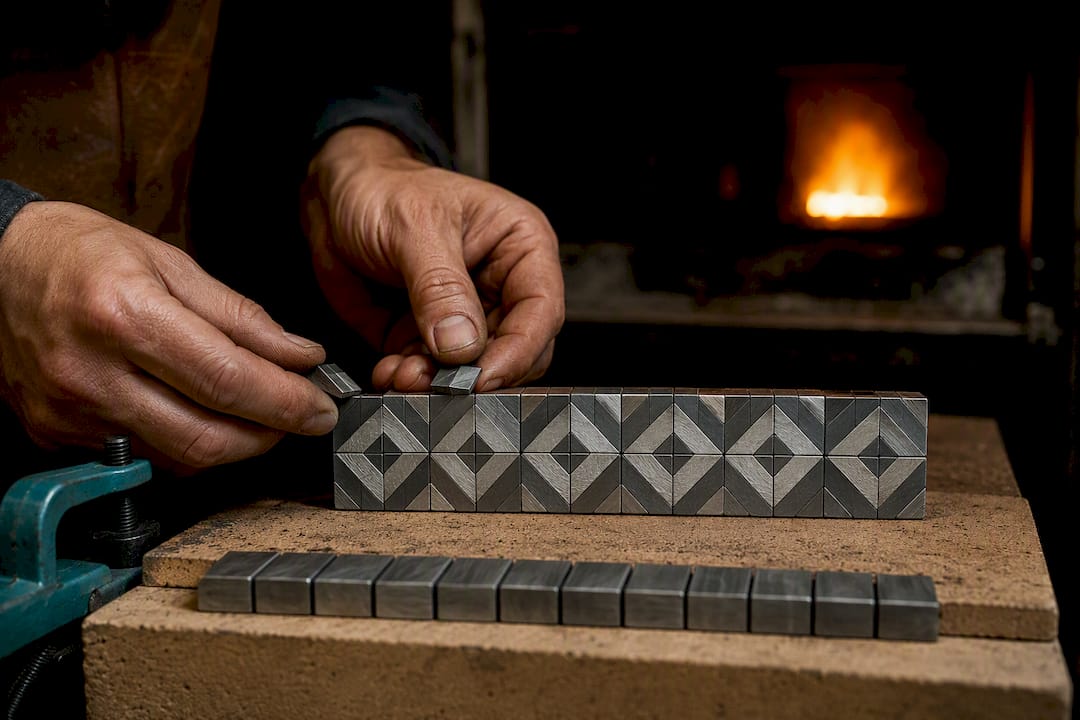
- Mosaic pattern. Small pre-cut tiles or rods of contrasting steel get arranged into a design, welded together, and often sliced to expose repeating cross-sections. Mosaic work is widely considered the most labor-intensive pattern category because of the precision stacking and multiple weld cycles it requires, and it’s almost exclusively a display or collector pattern.
- Random (or “raindrop chaos”) pattern. This is unmanipulated or lightly manipulated layered steel, where the folding process alone creates an organic, irregular figure. It’s the fastest pattern to produce, which makes it a go-to for budget-friendly hard-use blades.
- Turkish twist / W pattern. Multiple sub-billets are welded, cut, and restacked in a specific sequence to build a repeating W or chevron shape running down the blade. It’s an advanced technique requiring careful alignment across several welding stages, so it usually appears on mid-to-high-tier pieces.
- Herringbone pattern. Two twisted rods, twisted in opposite directions, are welded side by side so the resulting lines form a chevron resembling fish bones. Moderate to advanced difficulty, and almost always a visual centerpiece on display knives.
- Tile (or explosion) pattern. Cut sections of billet are rearranged, often at odd angles, before rewelding, producing a burst-like or fractured visual effect. This one leans advanced and shows up almost entirely on collector and art pieces.
- Snakeskin pattern. Fine, tight ladder-style grooves combined with careful grinding create a scaled texture reminiscent of reptile skin. It requires a steady, controlled hand and typically appears on premium display or gift blades.
Buyers shopping by intent tend to sort naturally into three groups. If you want a kitchen or hard-use knife, ladder, twist, and random patterns give you durability-focused steel with a pattern that’s a pleasant bonus rather than the main event. If you’re after outdoor or field blades, twist and raindrop patterns balance visual interest with practical steel choices that hold up to abuse. If you’re buying for display or collecting, mosaic, feather, herringbone, and tile patterns are where makers put their most demanding work, and where prices climb accordingly.
Why Some Patterns Cost More (And Which One Fits Your Use)
Complexity in a pattern is mostly a measure of labor, not performance. That distinction trips up a lot of first-time buyers.
Mosaic and canister-mosaic patterns command the highest prices because they require pre-arranged tiles, multiple precise welding stages, and careful alignment to keep the design from smearing during forging. One weld cycle out of sequence can cause the whole design to shift or blur, so makers spend disproportionate time on setup and quality control compared to simpler patterns. That labor gets baked into the price tag.
Here’s the part that surprises a lot of newcomers: a more intricate pattern doesn’t cut better. Cutting performance, edge retention, and toughness come down almost entirely to the steel grade and how it’s heat treated, not the visual complexity of the layering. A basic twist-pattern blade in well-heat-treated 1095/15N20 can outperform a mosaic blade with mediocre heat treatment every time it sees hard use.
Simpler patterns like random and twist require less planning and labor, which is exactly why they dominate the hard-use knife market. Around ten patterns cover the vast majority of what’s commercially available, and the ones near the “simple” end of that list are the ones you’ll find on knives actually meant to be used outdoors or in a kitchen.
Quick guidance by use case:
- Kitchen and everyday-carry knives: ladder or twist patterns, paired with a steel that holds an edge well.
- Outdoor and hard-use blades: twist or random patterns, since pattern complexity isn’t the priority and simpler layups are more forgiving in the field.
- Display and gift pieces: mosaic, feather, or herringbone, where the visual payoff is the entire reason for the purchase.
How to Spot Real Damascus Versus Etched or Printed Fakes
The market has no shortage of blades stamped with a “Damascus-look” surface finish that has nothing to do with actual pattern-welding, so a few checks go a long way before you buy.
- Check whether the pattern survives light grinding. Authentic pattern-welded steel shows its figure through the full thickness of the blade, so if a seller or reviewer lightly sharpens or grinds an edge and the pattern vanishes, that blade was likely surface-etched or printed onto plain steel.
- Look for unnatural uniformity. Real forge-welding leaves organic variation, since no two hand-manipulated billets come out identical. A pattern that repeats with mechanical precision across the entire blade, especially one that looks laser-etched or acid-stamped onto a flat surface, is a red flag.
- Ask for maker specifics. A legitimate maker or seller can usually tell you the steels used, an approximate layer count, and the manipulation technique behind the design. Vague answers or a refusal to discuss steel composition is a warning sign.
- Request provenance where it matters. For higher-priced pieces, ask whether the blade comes with any documentation on the forging process or the smith who made it.
Pro Tip: A quick trick some collectors use: run a fingernail lightly across the surface near the pattern lines. Real forge-welded layers create a subtle texture change you can sometimes feel at the boundary between steel types, while a printed or acid-stamped pattern feels perfectly flat and uniform edge to edge.
Etching, Grinding, and Caring for a Damascus Blade
Grind depth and etch time are what actually bring a pattern to life, and both decisions happen before a blade ever reaches a buyer.
Ferric chloride is the standard etching agent, and it works because it corrodes the different steels in the billet at different rates, digging out the softer layers and leaving the harder ones proud. Grind too shallow before etching and the pattern stays muted; grind too aggressively and you risk cutting into a section of the billet where the manipulated pattern hasn’t fully developed. Experienced smiths also plan blade profile and orientation deliberately, sometimes positioning the most attractive section of the pattern on the flats rather than the bevels, where grinding would otherwise erase it.
For care after purchase, a few habits protect the contrast:
- Avoid abrasive polishes or aggressive buffing, which can flatten the etched texture over time.
- Apply a light coat of mineral oil periodically on carbon-steel Damascus, since the high-carbon component is prone to rust.
- Store the blade dry, away from humidity, and wipe down after handling.
Full aftercare guidance for Damascus knives covers longer-term maintenance if you’re building a collection rather than buying a single piece.
Where to See These Patterns Done Right
Propswords carries Damascus-patterned pieces built around the same techniques covered here, from twist and ladder work suited to hard use to more decorative layups meant purely for display. The handcrafted Damascus hunting knife shows a practical pattern choice paired with a full-tang build, while the Damascus tri-dagger leans into ornamental figure work meant for a display case. Every listing details the steel composition and construction so you can apply the authenticity checks above before buying. Shipping within the USA is free, and product pages spell out specs rather than hiding them. Browse the full Damascus knife collection to compare pattern styles side by side.
What the Pattern Actually Tells You (And What It Doesn’t)
Most buying guides treat pattern complexity as a proxy for quality, and that’s backwards. A wildly intricate mosaic pattern tells you a maker spent a lot of hours at the forge. It tells you almost nothing about whether the blade holds an edge, resists chipping, or survives a decade of hard use.
The conventional advice to “buy the most detailed pattern you can afford” makes sense for display pieces and falls apart the moment a blade is meant to actually cut something. Steel selection and heat treatment do the heavy lifting on performance, and a well-made twist or ladder pattern in properly treated 1095/15N20 will outlast a poorly heat-treated mosaic blade every time.
If you’re buying, prioritize steel composition and heat treatment first, pattern authenticity second, and pattern complexity last, purely as a matter of taste. Skip that order and you’ll end up paying premium mosaic prices for a knife that can’t hold an edge through a weekend of use.
— Muhammad
Bring a Real Damascus Pattern Home
If you’ve made it this far, you already know more about pattern-welding than most retail listings bother to explain. Propswords puts that same transparency into its product pages, spelling out steel composition, construction, and finish details on every Damascus piece it sells, whether you’re after a hard-use hunting knife or a display-grade dagger.
Whether your priority is a ladder-patterned blade built for the field or a mosaic-style piece meant for a display case, Propswords carries both ends of that spectrum with full spec transparency on every listing. Free shipping within the USA and a straightforward return policy take the risk out of ordering online, and customer support is available by phone if you have questions about a specific piece before you buy. Start by browsing the top replica swords and Damascus pieces currently available, and apply the authenticity checks from this guide to whatever catches your eye before you check out.
Sources
- Types of Damascus patterns — Red Label Abrasives
- How to create Damascus patterns — BLADE Magazine
- How Damascus steel is made: the forging process — HM Knives
FAQ
What are the different Damascus patterns?
The most common patterns are ladder, twist, raindrop, feather, mosaic, random, Turkish/W twist, herringbone, tile (explosion), and snakeskin, each produced through a different combination of stacking, twisting, cutting, and restacking during forging.
What is the hardest Damascus pattern to make?
There’s no single pattern that’s hardest in absolute terms, but makers widely consider mosaic and canister-mosaic patterns the most time-consuming because they require pre-arranged tiles and multiple precise welding stages, while twist and ladder patterns are more practical for everyday functional knives.
How can you tell if Damascus steel is real?
Check whether the pattern persists through light grinding or sharpening. Authentic pattern-welded Damascus shows its figure through the full thickness of the steel, while a pattern that disappears after grinding likely means the blade was surface-etched or printed rather than forge-welded.
How is a Damascus pattern created?
A maker stacks contrasting steels like 1095 and 15N20, forge-welds them into a solid billet, manipulates the billet through twisting, cutting, or restacking to build the design, then grinds and etches the blade with an acid like ferric chloride to reveal the contrast between the steel types.
Recommended