TL;DR:
- Knowing convention rules and materials is essential to ensure your foam sword passes safety checks.
- Proper assembly, sealing, and detailing techniques make a lightweight foam sword look realistic and withstand wear.
- Pre-convention testing, including length, weight, flexibility, and seam integrity, helps avoid disqualification.
You’ve spent weeks planning your cosplay, and the sword is supposed to be the showstopper. Then you arrive at the convention and watch someone get turned away at the door because their prop failed the safety check. That moment stings, and it’s completely avoidable. The difference between a sword that wows the crowd and one that gets confiscated comes down to preparation. This guide walks you through every step, from understanding convention rules to final safety checks, so your replica sword is both jaw-dropping and fully compliant.
Table of Contents
- Understanding cosplay sword requirements and safety rules
- Gathering your materials and tools
- Step-by-step cosplay sword preparation
- Mistakes to avoid and troubleshooting tips
- Testing and convention-day readiness
- Our perspective: Why expert prep means more than accuracy
- Find the perfect convention-ready sword or kit
- Frequently asked questions
Key Takeaways
| Point | Details |
|---|---|
| Know the rules | Each convention sets its own sword size and material restrictions you must follow. |
| Choose proven materials | EVA foam with a PVC or wood core offers optimal safety and visual effect for cosplay swords. |
| Layer details for realism | Foam clay and expert painting transform simple swords into showstopping props. |
| Test before you go | Always check your sword for durability and compliance before heading to the con. |
| Master the finishing touches | Seamless edges, rounded points, and realistic paint separate average props from prize winners. |
Understanding cosplay sword requirements and safety rules
Before you cut a single piece of foam, you need to know the rules of the game. Every major convention has a prop weapons policy, and swords are almost always at the top of the list. Getting this wrong means your hard work stays in the car.
Convention rules ban metal blades and require foam, PVC, or other lightweight materials for any sword prop. This isn’t just bureaucratic caution. Metal blades, even decorative ones, pose real injury risks in crowded spaces. Most events also enforce length limits, typically between 150 and 180 cm, and prohibit sharp points entirely.
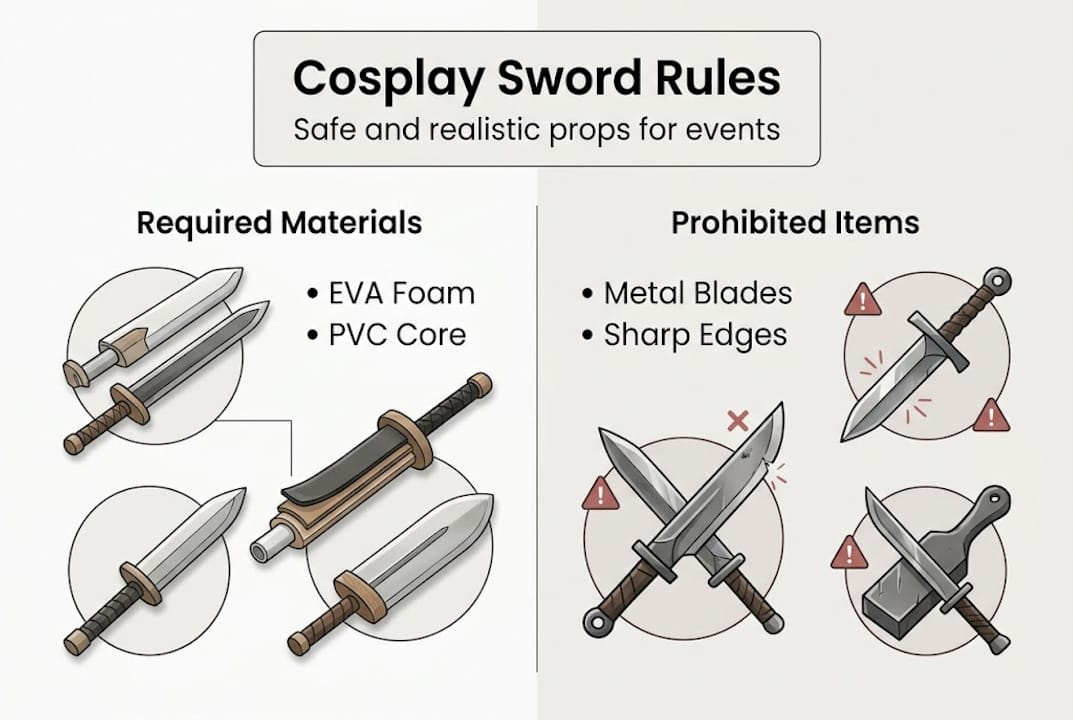
Here’s a quick breakdown of what’s generally allowed versus what gets you flagged:
| Material/Feature | Convention status |
|---|---|
| EVA foam blade | Allowed |
| PVC core (internal) | Allowed |
| Rounded foam tip | Allowed |
| Metal blade (any type) | Banned |
| Sharp point | Banned |
| Rigid fiberglass | Usually banned |
| Wood core (exposed) | Often restricted |
Beyond materials, peace-bonding is a near-universal requirement. This means a convention staff member physically inspects your prop and attaches a visible tag confirming it passed review. Tip covers, rounded edges, and clean construction are all part of passing that check. Check additional cosplay prop restrictions at your specific event well before you pack your bag.
“A well-built foam sword isn’t a compromise. It’s the smarter choice. It’s lighter, safer, and passes every check without drama.”
For a deeper look at picking the right build from the start, the guide on choosing safe cosplay swords breaks down the decision process clearly. You can also explore sword materials for conventions to understand why material choice affects both safety scores and visual results.
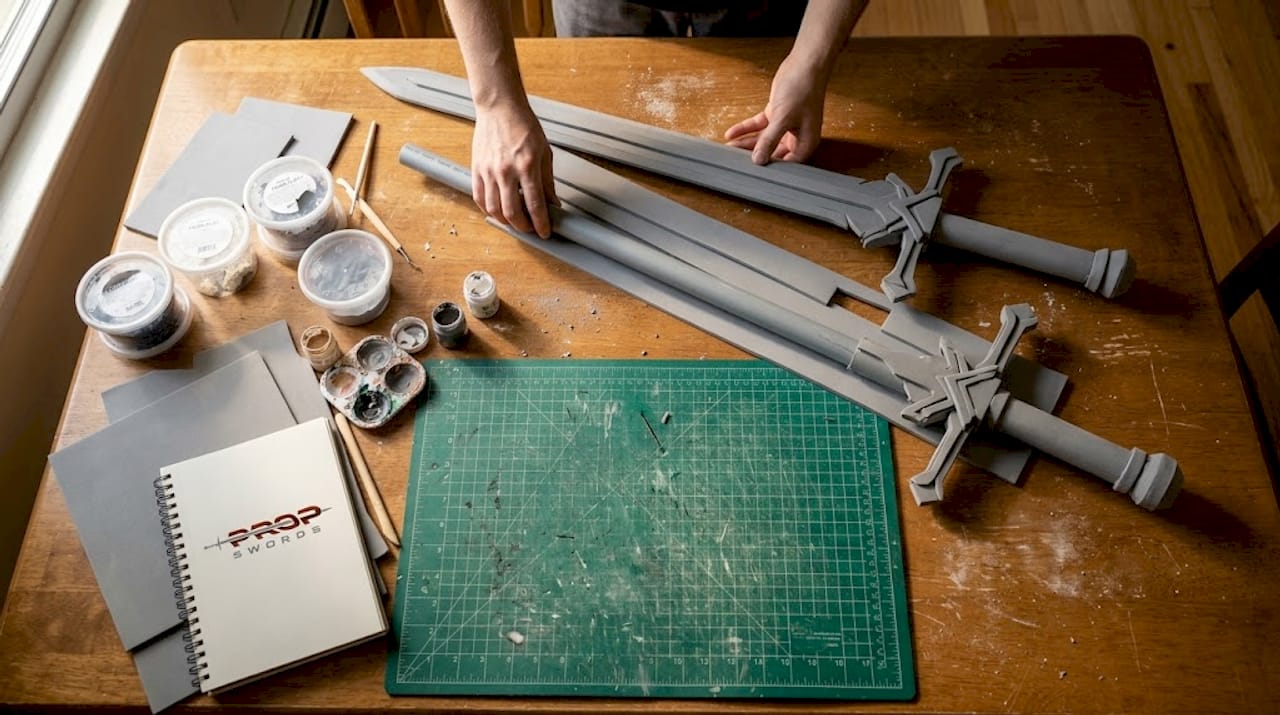
Gathering your materials and tools
Once you know the rules, the next step is gathering everything needed for success. A great sword build doesn’t require a professional workshop, but it does require the right supplies.
EVA foam (4 to 10mm thick), a wooden dowel or PVC core, and foam clay for sculpts are the core trio for most convention-legal sword builds. EVA foam wins over insulation foam for one key reason: it’s denser, holds paint better, and survives a full convention day without crumbling. Insulation foam is cheaper but brittle, and it tends to crack at stress points like the crossguard.
| Tool/Material | Recommended spec | Purpose |
|---|---|---|
| EVA foam sheet | 6mm or 10mm thick | Blade and guard shaping |
| PVC pipe or wood dowel | 12 to 16mm diameter | Internal core/spine |
| Contact cement | Baumgartens or Barge brand | Bonding foam layers |
| Heat gun | 300 to 500 degrees F | Shaping and sealing foam |
| Craft knife/box cutter | Sharp, replaceable blades | Cutting and beveling |
| Foam clay | Standard cosplay grade | Raised details and textures |
Optional upgrades that separate good builds from great ones:
- Rotary tool (Dremel): Carves fine details into foam with precision
- Metallic acrylic paints: Creates convincing steel and gold effects without real metal
- Flexible sealant (Plasti Dip or Mod Podge): Protects paint from chipping during wear
- Worbla thermoplastic: Reinforces high-stress areas like the handle connection
Pro Tip: Foam clay shrinks as it dries, sometimes up to 20%. Always overbuild your details slightly thicker than you want the final result. What looks chunky wet will look perfect dry.
For inspiration on what finished replica sword material quality looks like at a professional level, browse finished examples like this high-density foam sword to calibrate your own build goals. More sculpting guidance is available through these foam clay sculpting tips.
Step-by-step cosplay sword preparation
With everything ready, you’re set to bring your sword to life step by step. The standard build process follows a clear sequence: pattern, cut, bevel, glue, reinforce, detail, seal, and paint. Skipping steps here is where most builds go wrong.
- Draft your pattern. Print or hand-draw your sword’s silhouette to scale on paper. Tape it together and hold it next to your body to confirm proportions before touching foam.
- Cut your foam. Trace the pattern onto your EVA sheet and cut with a sharp craft knife. Use long, smooth strokes, not short sawing motions, to get clean edges.
- Bevel the blade edge. Angle your knife at roughly 45 degrees along the blade edge to create a tapered look. This is what makes foam swords look like real blades instead of flat rectangles.
- Insert and glue the core. Cut a channel down the center of your blade and insert the PVC or dowel core. Apply contact cement to both surfaces, let it tack for 60 seconds, then press firmly.
- Layer the crossguard and handle. Cut guard pieces separately, glue them around the core, and wrap the handle in craft foam or leather-look vinyl for grip texture.
- Add details with foam clay. Foam clay creates organic raised details like runes, engravings, and decorative ridges. Use wet fingers to smooth it, and remember to overbuild for shrinkage.
- Heat seal the surface. Run a heat gun quickly over the foam surface to close the pores. This step is critical for paint adhesion and gives the blade a slightly harder skin.
- Prime and paint. Apply a flexible primer, then build up your metallic or colored layers. Dry-brushing a lighter silver over a dark base coat creates a convincing steel effect.
Pro Tip: Watch an
EVA foam sword video tutorial before your first build. Seeing the bevel cut and heat-sealing steps in motion saves hours of trial and error.
For more guidance on picking the right design before you build, the step-by-step sword selection guide helps you match your skill level to the right project.
Mistakes to avoid and troubleshooting tips
Even careful builders encounter snags, so here’s how to keep your sword con-ready. Most problems trace back to a handful of repeatable mistakes.
- Weak core attachment: If the core shifts inside the blade, the sword flexes unevenly and can snap at stress points. Always use contact cement on both surfaces and clamp while drying.
- Rushing the paint layers: Painting over wet primer or skipping the sealer coat causes flaking within hours of wear. Give each layer at least 30 minutes to cure.
- Leaving sharp foam edges: Freshly cut EVA foam can have surprisingly sharp corners. Sand all edges with 220-grit sandpaper and run the heat gun lightly to round them.
- Skipping the seam check: Visible glue lines and uneven seams are the first thing peace-bonding staff notice. Clean seams signal a well-built, safe prop.
- Overloading details: Too many raised elements make a sword heavy and fragile. Prioritize the details that read from five feet away, which is how most people will see your costume.
“Dirty seam lines and exposed glue aren’t just ugly. They signal a rushed build that may have structural weaknesses, and that’s exactly what peace-bonding inspectors are trained to spot.”
Rounded foam edges and clean seams are non-negotiable for passing inspection. If your sword warps after drying, use a heat gun to gently reheat the affected area and press it flat against a hard surface while it cools. If paint flakes, sand the area lightly, re-prime, and seal with a flexible topcoat.
For ideas on how a well-finished sword transforms a full costume, see how replica swords enhance cosplay. The anime sword buying tips page also covers what to look for if you decide to buy rather than build. Check out the top cosplay swords for 2026 for current favorites in the community.
Testing and convention-day readiness
You’ve built and refined your sword, but preparation isn’t complete until you’re con-ready. Testing before the event catches problems that are easy to fix at home and impossible to fix in a convention hallway.
| Check | Pass criteria | Fail indicator |
|---|---|---|
| Length | Under 150 to 180 cm (per event rules) | Exceeds posted limit |
| Weight | Comfortable to carry for 6+ hours | Causes arm fatigue in 10 minutes |
| Material | Foam or approved lightweight material | Any metal component |
| Flexibility | Blade bends slightly without cracking | Rigid, brittle, or sharp |
| Tip | Fully rounded, no point | Any sharp or hard tip |
| Seams | Clean, no exposed glue or gaps | Visible rough edges or splits |
EVA foam swords reduce fatigue and pass most peace-bond checks because they flex rather than break and weigh a fraction of what resin or metal props do. That matters a lot on hour seven of a convention.
Here’s your pre-con checklist:
- Measure total length against the specific event’s posted rules
- Test grip comfort with a full cosplay glove if your costume includes one
- Flex the blade gently to confirm the core is secure and nothing cracks
- Run your palm along all edges to check for sharp spots
- Photograph your finished sword for reference if staff have questions
- Practice attaching and removing any peace-bonding tag location in advance
Large props must disassemble for transport in many venues, so if your sword breaks into sections, test that connection point for strength. Review the FanimeCon peace-bonding requirements as a solid example of what detailed event policies look like. Understanding how swords impact your overall cosplay also helps you decide how much detail investment is worth it for your specific character.
Our perspective: Why expert prep means more than accuracy
Here’s something the cosplay community doesn’t say loudly enough: a perfectly accurate metal sword is actually a worse convention prop than a well-built foam one. Not because accuracy doesn’t matter, but because a sword that gets confiscated, causes injury, or leaves you exhausted by noon has failed its real job.
The cosplayers who consistently win best-in-show aren’t the ones with the most expensive materials. They’re the ones who understand that layering, finishing, and sculpting skill create the illusion of metal far better than actual metal does. A dry-brushed EVA blade under good lighting photographs more convincingly than a dull steel replica.
Prep steps aren’t just safety theater. They’re the craft. Every bevel cut, every sealed seam, every careful paint layer is what separates a prop that reads as real from one that reads as foam. The goal isn’t to make a sword. It’s to make a story. And that story needs to survive a full convention day without drama.
Explore how materials for cosplay swords affect both the build process and the final visual result to sharpen your material decisions before your next project.
Find the perfect convention-ready sword or kit
Not every cosplayer has the time or tools to build from scratch, and that’s completely fine. Sometimes the smartest move is starting with a professionally finished replica that already meets convention standards.
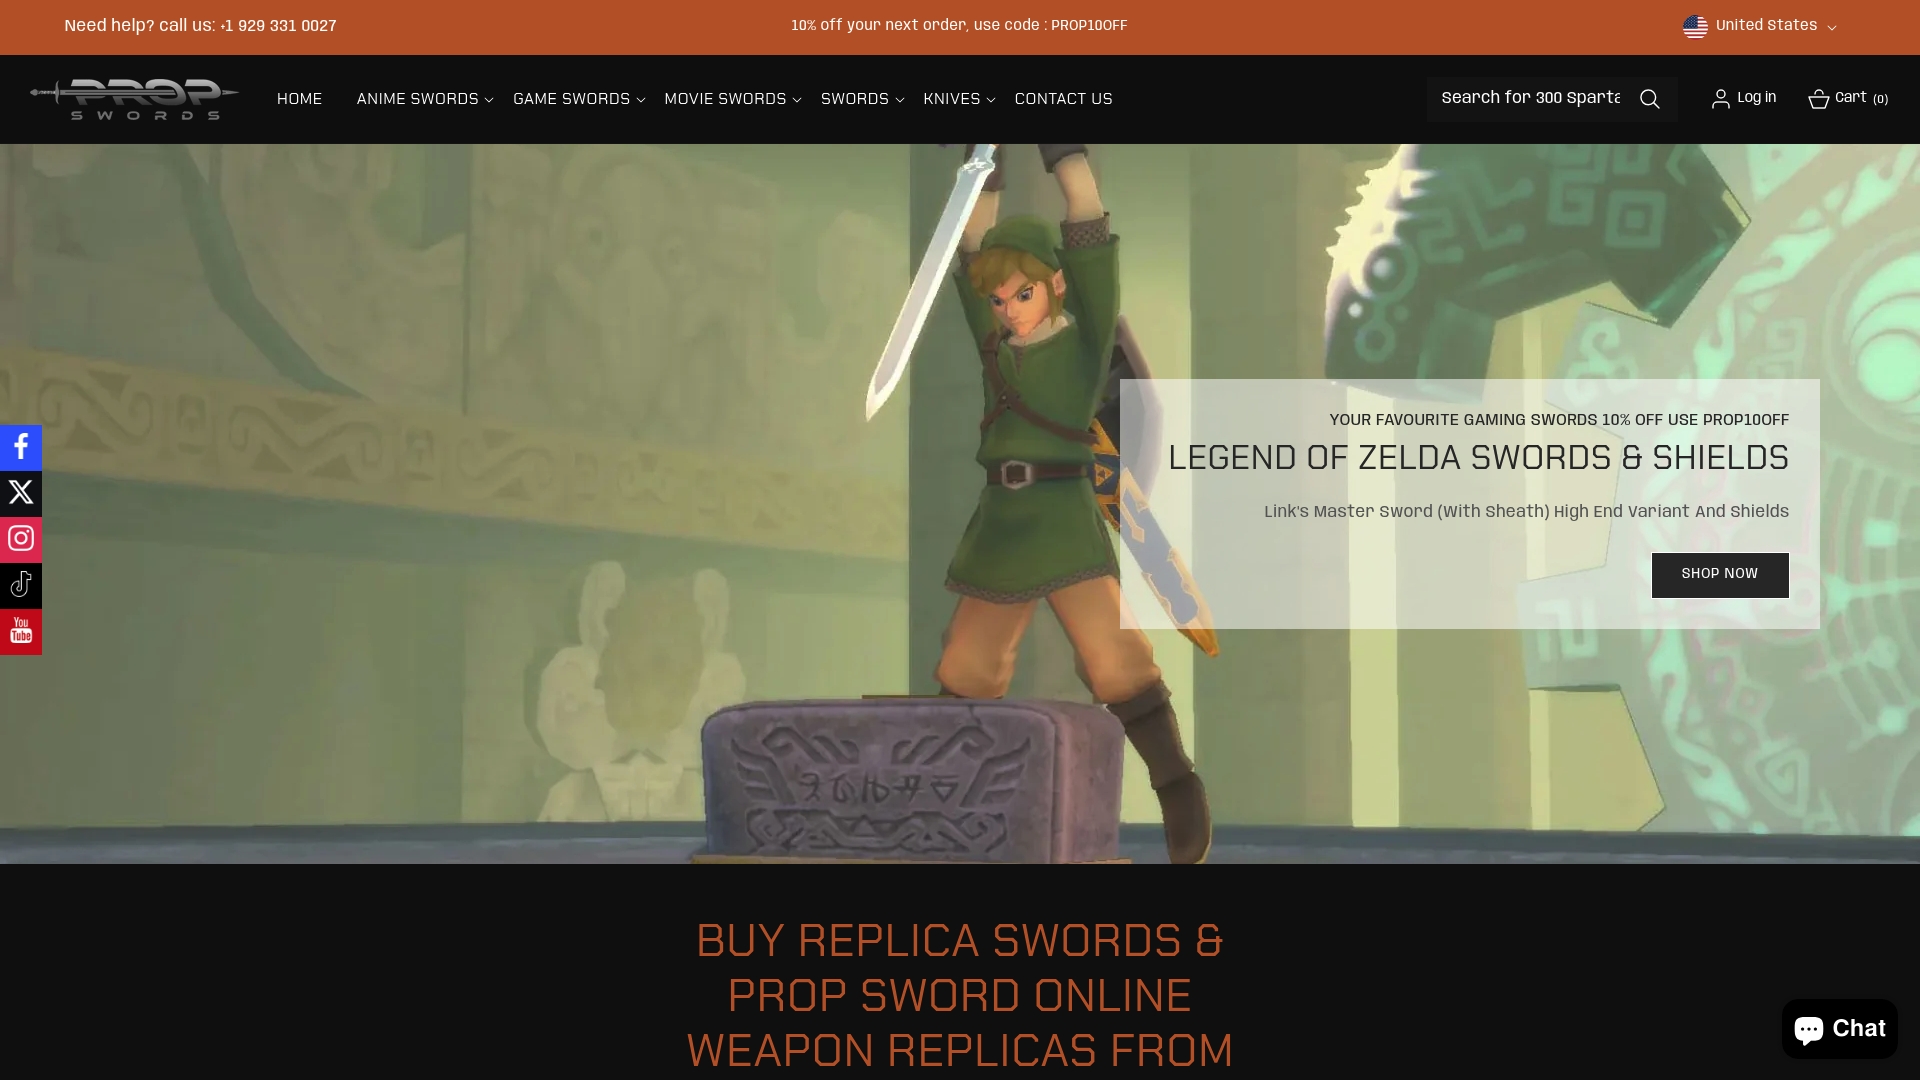
At Propswords, you’ll find a wide selection of convention-ready swords inspired by anime, movies, and historical weaponry, all built with cosplay use in mind. Whether you want a finished prop to carry straight to the con or a high-quality reference piece to guide your own build, the catalog has options for every character and budget. Free shipping within the USA makes it even easier to gear up before your next event. Browse the full store and find your next signature piece.
Frequently asked questions
What is the safest material for cosplay swords at conventions?
EVA foam is safest and most widely accepted at conventions due to its lightness and soft edges. It flexes on impact rather than breaking, which protects both the prop and the people around you.
How do I make cosplay sword seams invisible?
Heat sealing and sanding the foam edges, plus priming before painting, hides most seams. Bevel and clean seams before any paint touches the surface for the cleanest result.
What size sword can I bring to a convention?
Most conventions allow swords up to 150 to 180 cm, but event policies may restrict length and require disassembly for large props. Always check your specific event’s rules before you finalize your build dimensions.
Why is foam clay recommended for sword details?
Foam clay for organic details is easy to shape, bonds well to EVA, and creates textures that paint beautifully. It’s also lightweight, which keeps your finished prop within comfortable carrying weight.
How can I ensure my sword passes a peace-bonding check?
Use lightweight foam, rounded edges, and clean construction throughout your build. Peace-bonding is a requirement at many cons, so arriving with a tidy, flexible, tip-covered prop makes the inspection fast and stress-free.